Thursday, April 21, 2011

Plarn Tote - Repurposing your plastic bags into a bag


In celebration of Earth Day, I thought I'd do some kind of upcycle craft using the hundreds of plastic bags I have around the house, and since I've lately been in a crocheting kinda mood, we have a plarn tote.  Mostly, when I mention plarn to people, they say "What?" It's basically yarn made out of plastic bags.  So Plarn = Plastic + yarn.

To make plarn, all you do is fold the plastic bag so the fold follows the vertical line, and cut to make loop like strips of plastic (about an inch wide).  Then you join those strips by using what I think is called a reef knot.  Here's a youtube video of the process:  http://www.youtube.com/watch?v=hdTm2V4ssvY


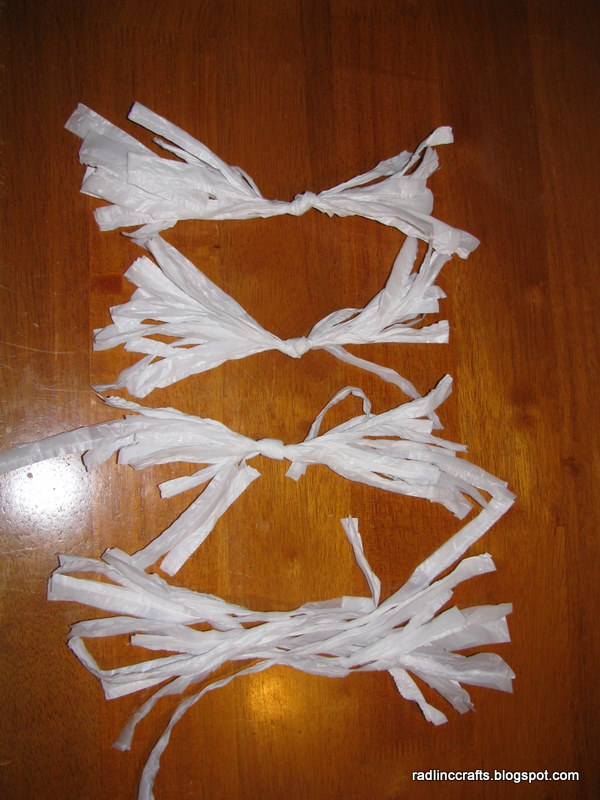
And some pictures of making plarn.  I started out with using scissors, but found soon after that using a rotary cutter makes things go just a tad faster.  Also, don't pull so fast or tight, because the plarn will break.  when this happens, I either just discard that loop or I tie it back together (IMO, tying it back together makes the crochet project look less clean).


You run thru a lot of bags, so it's your choice whether you want to make all the plarn at once, or make them a few bags at a time.  I opt for a few bags at a time, to rest my hand from crocheting so much in one sitting.


 In this tote project I ended up using 39 bags. I kept track of the bags by keeping the bottom strips of the bags and tying every 10 together.


When you have the plarn, you can begin using it like any other yarn.  I felt I needed to use a larger crochet hook, so I used one that's size 11.5, I've seen others use a smaller hook with equal success.

Here's the general pattern, all done with single crochets.

1.  chain the length of the bottom of the bag.
2.  turn and sc on the rest of the row's chains
3.  continue turning and single crochet til you've reached the desired bag bottom.
4.  When the desired rectangle has been met, crochet around the rectangle by doing sc around, and 2 sc for each corner.
5.  Continue to sc around and around the rectangle til you reach the 4 rows less than the desired bag depth.
6.  On the next row, you'll want to create spaces for the handles.  First mark the areas where you want the handles by putting yarn, or a stitch marker in place. *Sc til the marker is met.  From the marker, chain the amount of stitches on the previous row + 5 and sc to join on the next stitch marker.* Repeat til the row is complete.
7.  On the next (last) 3 rows, sc all the way around.  Finish Off.


HAPPY EARTH DAY!!!

Friday, April 15, 2011

My Current Projects

Okay, so this is a bit of a cop out post.  I've been working on several craft projects but nothing that has been full written up to be shared as a project post.  That being said, I'll at least share some pictures of what I've been working on.

I just recently started an afghan for my sister.  At the rate I'm going, she'll probably get it next year for Christmas. Click here for the pattern.  I love the design.


I made these for a friend's birthday.  The minion was made using the pattern I shared a few posts ago. (Pattern found here)  The unicorn was the first big amigurumi I made without following someone else's pattern.  I wrote down the stitches as I was going, so hopefully I'll be able to share that with you guys soon.  (Yes, it's copied from the likeness of the Despicable Me unicorn.)


I made several of the following birds (from the Angry Birds game) just because I wanted to try making them.  These ones were made without following someone's pattern also.  I need to write it down/type it up and share them with you.  I've been slacking a bit when it comes to blogging/sharing the projects (if you haven't noticed -- oh, thanks for being patient with me).


So, that's what I've been working on so far... all crochet projects.  Making amigurumis are rather addicting.  My next crochet amigurumi project is the pea shooter from Plants vs Zombies. I also hope to put together some cool Earth Day project posts.  (If you have any, feel free to send them my way and I'll include them).

Saturday, April 2, 2011

And the Winner is... (Nylon Flower Book Giveaway)


It's so sad to see National Craft Month go.  :(  Good thing it comes around again next year.

First off, thanks very much for entering the giveaway contest.  I want to try to have more of these contest, so I hope you come back and join on the future giveaways.

Okay, so I used random.org to pick a winner of the nylon flower giveaway.  The number assigned to the person corresponds to the comment number of your entry.  For instance, first comment of the blog post, will be entry #1, etc.

I will be contacting the winner soon for an address to mail your prize to. The winner will be getting the Nylon flower book, as well as a few nylons to get you started.

Without further ado, the WINNER IS:

Adriana.  :)  Congratulations and enjoy learning how to create beautiful nylon flowers.  I'll be emailing you soon.

Now for some additional giveaway news.  :)  I'm adding a bit of a change on how Rad Linc Crafts will be counting entries for future giveaways.  I wanted a way to have a bit more competition, as well as give readers a way to have more than one entry.  So, from now on, I will be adding the entries of the previous giveaway (just the one, not all past giveaways) to the next giveaway.  For instance, on my next giveaway contest, I will include the entries from this post automatically as entries on that giveaway.  If you've entered here, and enter again on the next giveaway, you will have two entries counted for the next giveaway.  Makes sense?

The next giveaway is set to happen in July.  Stay tuned for more information about that giveaway.

Thanks again for entering the contest, and thanks always for reading Rad Linc Crafts.  On to new adventures in the crafting world. :)