So, I'm playing some catch-up. It appears that I haven't blogged in far too long, and there were some projects last year that I'm quite proud of and wanted to share and archive, so the next few posts will be catch-up posts. :)
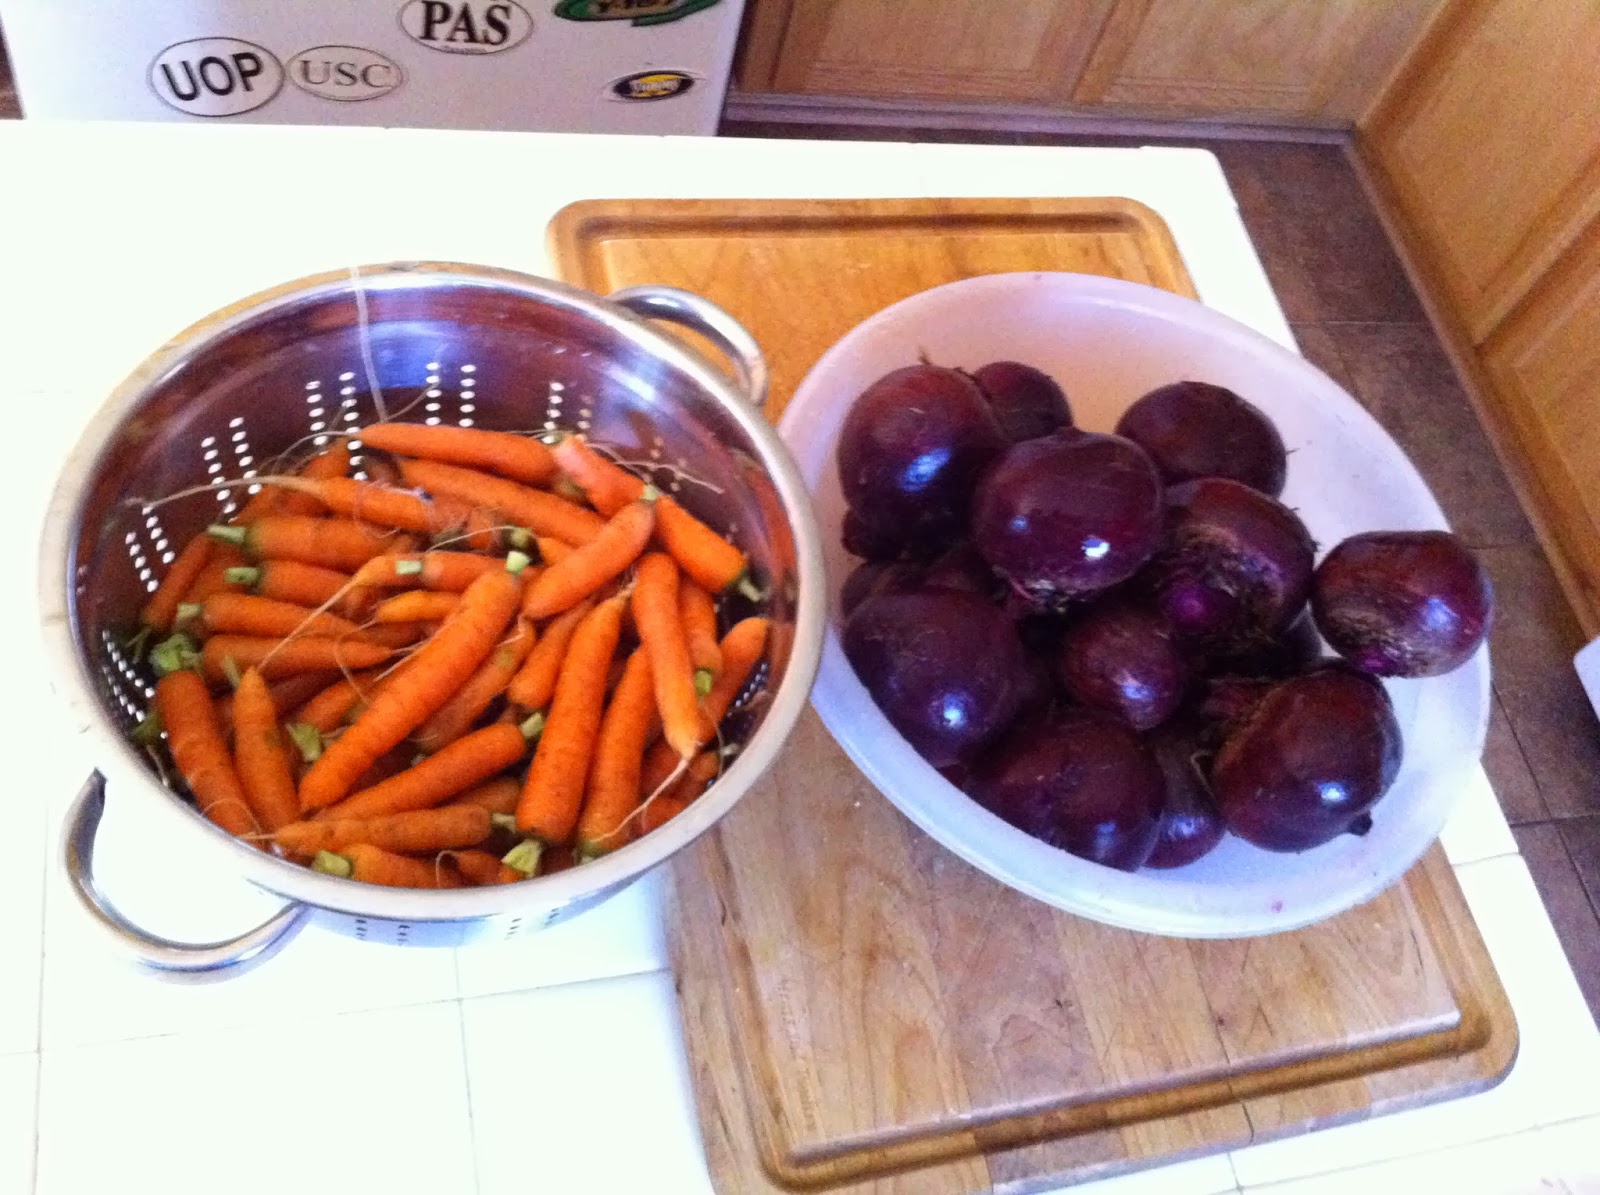
Last year's garden experience was a success. We ended up sharing quite a bit of our bounty to neighbors and co-workers. And we've learned quite a bit, and have waged war on various bugs in the process.
Here are some pictures from last summer's garden.
We had a rat problem during the summer that ate our tomatoes, and our edamame. Also, I think we over crowded our tomatoes too much, so they didn't really produce. Otherwise, we count this last year as a success. We did quite a bit of preserving, from blanching and freezing what we could (green beans, beets, carrots, spinach, broccoli), making zucchini lasagnas, zucchini turkey burgers, zucchini muffins and freezing all of those. Making dried zucchini chips by dehydrating zucchini slices. Making zucchini kim chi. Pickling and canning jalapenos, freezing jalapeno halves. Making jalapeno jelly.
For thanksgiving, we got to use our frozen green beans for green bean casserole, and fresh carrots from the garden. We also used kale leaves for dressing up the plate that the turkey was going on. It was wonderful to be able to use items from the garden for thanksgiving.
We only hope that this coming garden season will also be a success.
Showing posts with label gardening. Show all posts
Saturday, January 18, 2014
Saturday, March 2, 2013
2013: Our Garden
This year we're finally attempting the garden that we have wanted to setup for a while now. A few years ago, we had the idea of expanding our garden to cover about 1/3 of our backyard... That's about a 18' x 36' area (I think). Well, the last few years were quite busy... and we just didn't find the time to do it. But last fall, we finally put up our new fence (to segregate our garden from our lawn and dogs), and as of earlier this month, we cleaned it up, built some garden beds, put some weedblock down, and filled the beds with dirt. :)
Here's a look of the garden after we put the garden beds in. We also completely flattened the back side, and made it into a big flat in ground garden area (wasn't done yet when the picture was taken).
Even with the dangers of frost still here (...yeah, I live dangerously like that), I planted a few of the seeds outside, and also began a few trays of seeds inside. I still have a few seeds that I recently bought and need to plant outside.
The good news is as of today, I finally saw something start germinating in the garden. I took a picture of it, but you have to look really close at the first few leaves of my bok choy plants. :) Exciting isn't it!
The indoor plants aren't doing too bad either. Most of the first tray are tomatoes, the back tray are an assortment of peppers, which usually take longer to germinate. I'd like to make a heating mat of some sort to lessen the germination waiting period one day.
Anyway, that's what's going on. :) I can't wait to share some more mature garden pictures and harvest pictures with you guys.
Monday, June 13, 2011
My Container Garden
Just a quick post to show you guys my container garden. This year, I decided to put my vegetable garden all in pots that I had sitting around. (I apparently have a lot of pots). This is due to a few reasons. 1. Our in-ground garden has been covered by weeds in the last few years. I wanted to give that garden a year off to do some more intense weed killer spraying and hopefully get rid of the weeds before planting in there again. 2. We have been talking about expanding the garden, and decided that it would be tougher to do so if we had the veggies all there. 3. I wanted to see if a container garden would succeed once the plants grew bigger. 4. I wanted more control over the soil.
So, anyway, yup... container garden.
Here are some pictures:
Overall, the garden seems to be doing well. We've already had a few snail attacks, but that would have happened more so with an in-ground garden. I like that I can sprinkle snail pellets all over the ground and know that it's not getting in the pots/food.
Hope your garden is doing well too.
So, anyway, yup... container garden.
Here are some pictures:
| cucumber, tomatoes, green beans |
| green beans again, chives, endives, spinach. In the back are basil and strawberries. |
| yet to be planted in another place: cantaloupe and watermelon. (there's also brussel sprouts, but I don't think they're gonna make it) |
| here's a better picture of the spinach, endives, chives, basil and way in the back strawberries |
| here are my peppers (jalapeno, green bell, orange bell) and eggplants. |
| my tall beef steak tomato plant is doing the best. I'm trying to keep up on its pruning. |
Hope your garden is doing well too.
Friday, April 2, 2010
Worms and Gardening, Part 2
Making your own Worm Bin
In part 1 of Worms and Gardening, we talked about what vermiculture was and how beneficial it is to use worm compost in the garden. If you missed it, check out the post here. There are also a few links on the bottom of the post to get additional information about vermiculture. So, now that you know all about worm composting, this post will show you how to set up your own worm poo making factory. :)
This is a great setup for someone limited with space, just want a small factory, or just want to try things out for starters.
What you need:
2 plastic bins (with lids) -- Make sure to get non clear ones.
material for bedding -- I used an old phonebook.
handful of soil
red wigglers (also known as red worms)
food for your worms
Friday, March 26, 2010
Worms and Gardening, Part 1
I've decided to make this a 2 part series because it just seems like a whole lot of info just for one post. We start this series with learning about vermiculture and the benefits that these wigglers bring to our gardens. We end the two part series by learning how to make our own worm bin, and how to use the bin. So let's start.
Wednesday, July 15, 2009
Never Buy Green Onions Again
I actually don't remember how the idea came upon us. I think maybe we saw a blog somewhere that talked about replanting green onions. We've been doing this for months now, and we are finding that we no longer waste half the bundle of green onions from the store. The idea is simple. Cut the part of the green onion you use, and replant the roots. Then keep cutting the greens off the plant.
Here's what we do:
1. Buy green onions from the grocery.
2. Use the greens for what you need, cutting and saving the bulb/roots part of the onion.
3. Put the bulb/roots part of the onion in water. It will actually start growing roots, and growing from there.
4. Plant bulb/roots into a pot with some soil.
5. Cut whenever you need green onions.
Okay, so technically you can skip 3 and it'll work out just fine. But, it's kinda fun watching all the roots grow. It's good affirmation that the process will work. :-D
Here are a few pictures:

These last two pictures are the ones that we've had for at least 3 months and have been trimming for use when needed.
Sunday, July 12, 2009
Hanging Tomato Plant Update #2
I thought I'd just do a quick post today and show you guys how well the Hanging Tomato Plant is doing. Overall it seems to be doing great, but the heat is causing it to use up it's water quite fast that we water it daily and sometimes more and it's still drying up some. Next time, maybe only two plants per bucket, and maybe I need to splurge and get one of those Home Depot 5 gallon buckets.
Here are some pictures taken just recently. The tomatoes were picked that day and they were super sweet and absolutely delicious. (not to brag or anything) :)

Here are some pictures taken just recently. The tomatoes were picked that day and they were super sweet and absolutely delicious. (not to brag or anything) :)

Friday, June 5, 2009
First Harvest of the Year
Hi all,
Sorry for being MIA... again. I hope to give you some good blog entries in the next couple of days to make up for it.
As a quick post, I thought I'd share that we were able to have a good initial harvest today from our garden. We made a salad of carrots, beets, spinach, beet greens, and romaine lettuce. Delicious. There really isn't anything better than getting your salad straight from the garden.

Along with that, here's how the tomato plant is doing. It's starting to slowly fall downwards to be a hanging plant. The leaves are a bit on the light side that concerns me a bit. I think I need to add more nutrients to the plant to help it out a bit, and we just moved it to get more morning sun.
More to come soon. Stay tuned.
Sorry for being MIA... again. I hope to give you some good blog entries in the next couple of days to make up for it.
As a quick post, I thought I'd share that we were able to have a good initial harvest today from our garden. We made a salad of carrots, beets, spinach, beet greens, and romaine lettuce. Delicious. There really isn't anything better than getting your salad straight from the garden.
Along with that, here's how the tomato plant is doing. It's starting to slowly fall downwards to be a hanging plant. The leaves are a bit on the light side that concerns me a bit. I think I need to add more nutrients to the plant to help it out a bit, and we just moved it to get more morning sun.
Monday, May 18, 2009
Friday, May 1, 2009
Hanging Tomato Plant
It's been quite a while since the last time I posted any new projects. Like I said, sometimes life just gets in the way. Also, I noticed I was writing mostly about food... so I was thinking of another project to post about. So, I came up with this. Yes, it's food related, but it's more about the gardening involved.
Anyway, last year I saw some plans on upside down tomato plants which I decided to try. It worked out pretty well, and it was quite interesting watching the plant actually grow. The plant actually figured out which direction was up, and started growing upwards before gravity hit and it became more of a hanging plant that you'd expect. This year, I decided to try a slightly different approach. I wanted to try to grow more than just one plant in the same bucket. This also made it much easier to plant than a completely upside down plant. Here's the outcome. I just planted it, so obviously no tomatoes yet, but hopefully I'll be able to give you updates on how it goes thru the growing season.
Alright, so I'll show you what I did.
Materials
- Tomato plants. (For this one, I used 4 that just started growing in my garden (yeah, I didn't really plant them this year so I have no clue what kind they are)
- potting soil
- screen material
- bucket
- a place and some kind of contraption to hold the bucket up. It could get heavy, so make it sturdy.
How to:
1. First drill holes into an empty bucket. I'm trying it out with a cat litter bucket because it has somewhat flat sides. Drill a hole on all 4 sides, and another one in the bottom for drainage. I used a door hole drill bit.
2. Place a small piece of screen material on the bottom and add soil up to the level of the holes on the side.

3. I created small braces using more screen material (around 1.5" x slightly bigger than the circumference of the drilled out holes). I stapled the screen material to make a cylinder that would fit the drill hole. I placed the plant thru the screen cylinder and the screen cylinder thru the drill hole, then filled up the space within the cylinder with some potting soil. The tomato plant in the picture looks a little droopy, but I think it was mostly just shock of the plant. I kinda yanked it out of the ground and stuck it here. It didn't like that much, but as you'll see later, once it gets acclimated in the bucket, the plant perks back up.
4. Do Step 3 with the other 3 holes. Then fill up the rest of the bucket with soil.

5. Hang up the plant. This one will be left with your imagination... :-) But make sure to put it in a place you'll be able to water it, and also a place that won't be too low that it'll get eaten by jumping dogs... yes, it's possible.

That's it... just remember to water it and hopefully we'll all have tomatoes in the coming months. :-) As you can see here, the plants are already looking better.

Here are some pictures of the upside tomato plant from last year.
Subscribe to:
Posts (Atom)